CCS Point of Sale
You are here: start » guides » restaurant » transferorders
Table of Contents
Transfer an order from a table to another
Summary
Transferring orders from one table to another is a common everyday task for a server in an restaurant. Integration of this option into CCS POS software will make it easy for servers to transfer tables.
Guide Sub Headings
Add Tables Button
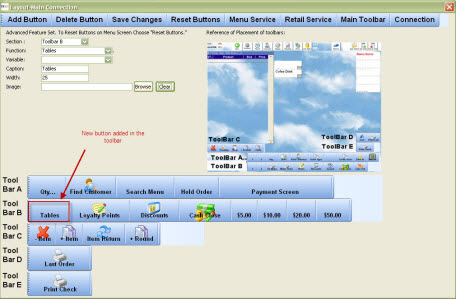
The first step is to add a tables button in the toolbar of the POS terminal. This is done through the menu button layout option in the control panel of Office touch.
To do this, go to CCS Office-Touch » Control Panel » Menu Button Layout
2. Set Section to “Toolbar B or C”
3. Set Function to “Tables”
4. Set Caption to “Tables”
5. Set Width to “250 (default value) or any other value”
6. Assign an image to your button
7. Click on “Add Button”
Fig 1:Menu Button Layout
Transfer Order from One Table to Another
Once your button is added in the toolbar, open CCS Terminal.
To do this go to Windows Start Menu » CCS» Terminal » Enter your code and press enter
Click on Tables » Transfer Tables in the consecutive POS terminal screens
Select the source and destination table from the list of tables in the consecutive screens to transfer your order
You have now transferred an order from table to another in CCS
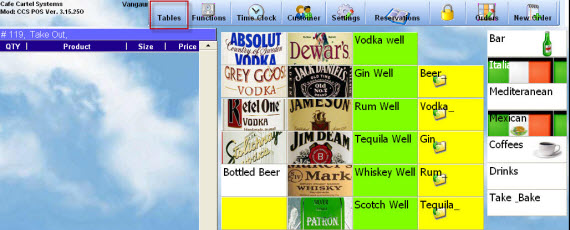
In the POS terminal screen as shown below in Fig 2 you will find your tables button added in your toolbar:
Fig 2:POS Terminal Screen showing tables button
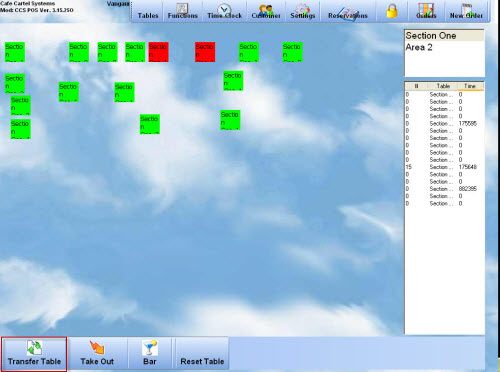
The transfer tables button is shown in the Fig 3:
Fig 3:POS Terminal Screen showing transfer tables button
Trace: • transferorders


