CCS Point of Sale
You are here: start » guides » security » data_protection_management
Table of Contents
Data Protection Management
Once you have your data protection scheme in place, you can then manage it. The normal course of managing your data protection is the following topics:
This feature is only required when you use a Network Drive with TrueCrypt Encryption of the data.
- Getting Prepared
- Connecting to your Network Drive
- Mounting your Encrypted Hard Drive
- Starting SQL Server
- Verifying the SQL Server Connection to the Encrypted Database.
- Starting your POS Software
Getting Prepared
Before you do anything make sure you don't have any programs running. The screen should be on the Microsoft windows screen, similar to the screen shot below.
Connecting to your Network Drive
The first step to getting connected is making sure your network drive is configured and connected to your computer running SQL Server.
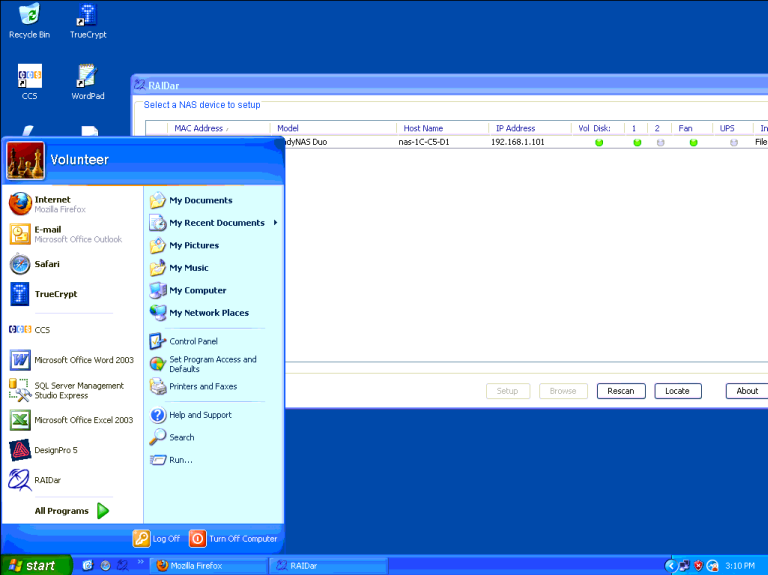
From the Desktop, locate the “Radar” icon, this is the ReadyNas Drive by Netgear.
Figure A:

When the Radar window comes up, it will automatically scan the network. It should find the drive, there will be a list of drives that appears if you have more that one drive. This should be in your documentation if you have to choose the drive.
This figure shows the Network Drive on the list. This is the drive we will be using in this example.
Figure B:

If no drives are found, the following result will occur. If this happens, then you should ensure that your Network drive is powered on and connected to the network.
Figure C:

Mounting your Encrypted Hard Drive
We use TrueCrypt for secure encryption of the database and files. The next program you will start is TrueCrypt. This is also located on your desktop, or in your program files, from Start - All Programs - True Crypt.
The picture below shows what TrueCrypt looks like when it has been started.
Figure A:
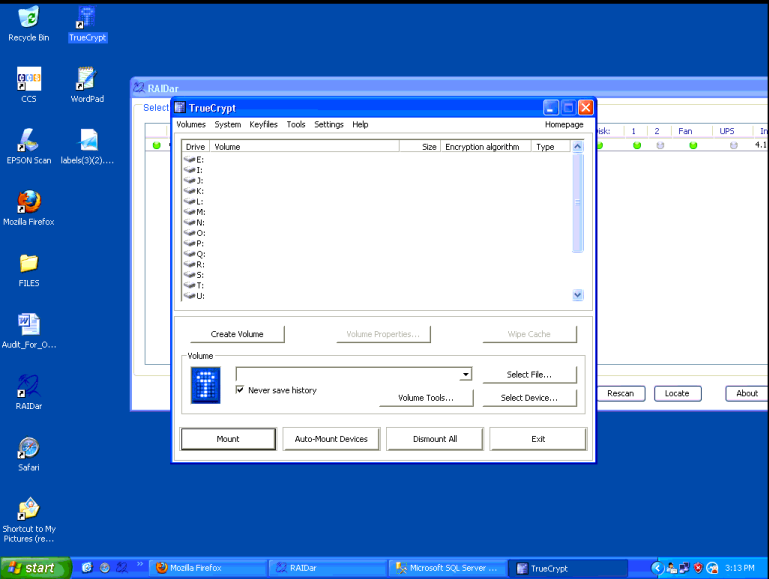
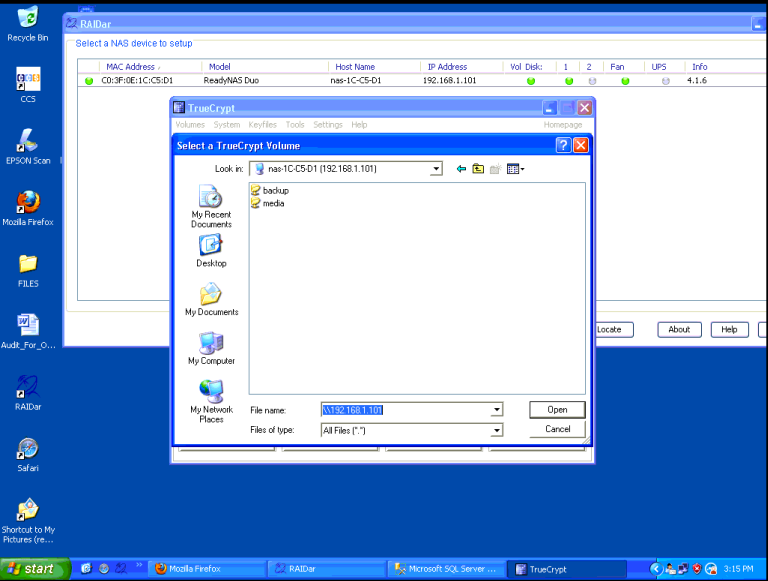
Once you have started TrueCrypt you will have to locate the TrueCrypt file from the network drive. You can use the IP Address of the drive shown in the example below. The end path may vary based on where you have to file store.
The image shows a path that starts like this, between the quotes: “\\192.168.1.110”
Once you have found the folder, you will then mount it as a new drive.
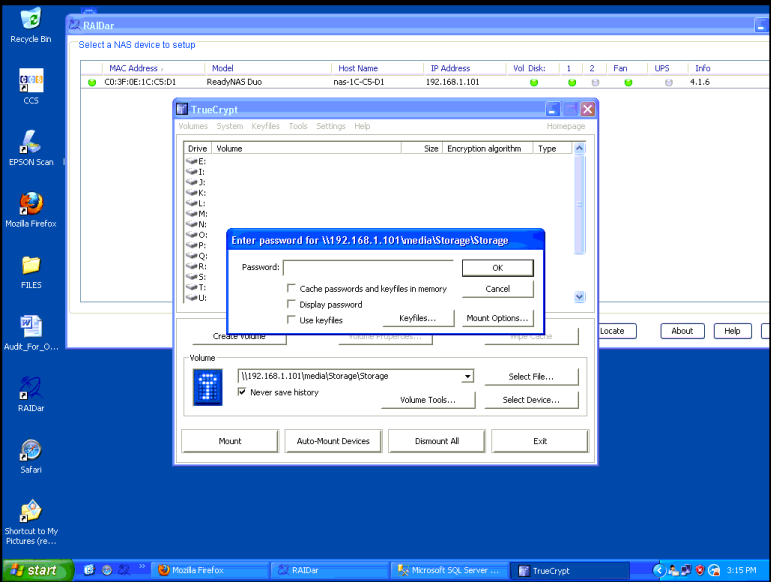
Once you have located the file, you press the Mount button. You will be prompted to input your password for the file.
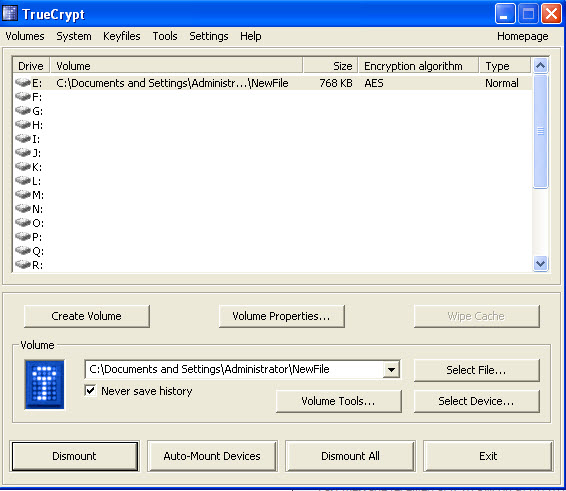
You can then mount the drive.
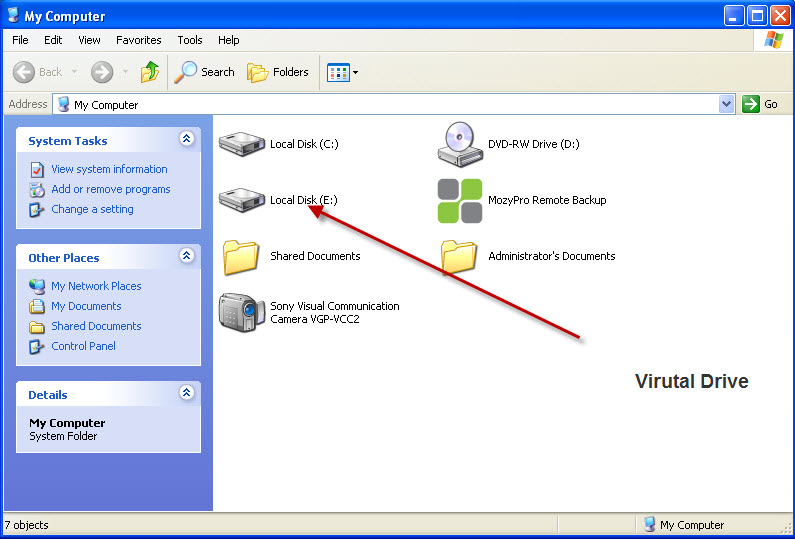
This virtual drive will appear in your Windows “My Computer” as a drive.
Starting SQL Server
SQL Server is what runs the database. Only after you have mounted the drive can SQL Server access the database. This next procedure will show you how to properly start sql Server.
Keep in mind, if you have the same connection settings (mounted drive path to database), you can by bypass these screen shots by the following steps:
- Go to Start - SQL Server Express Manamgement Stuidio.
- Connect to the (Local) Server.
- Right Click on the Local SQL Server Node
- Select to Restart the SQL Server Service
- Go to the next Step in this guide - Starting the POS
Verifying the SQL Server Connection to the Encrypted Database.
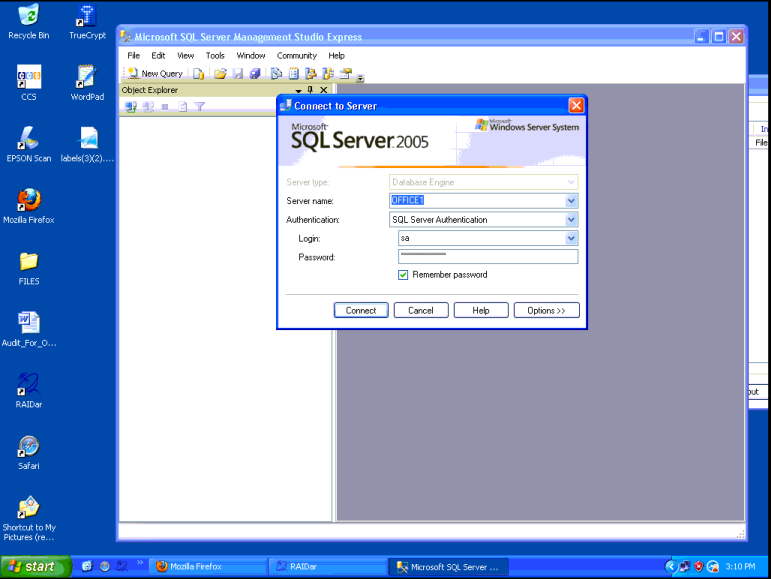
Locate SQL Server from your Start Menu
Connect to the SQL Server. It the settings may be defaulted when you open the window.
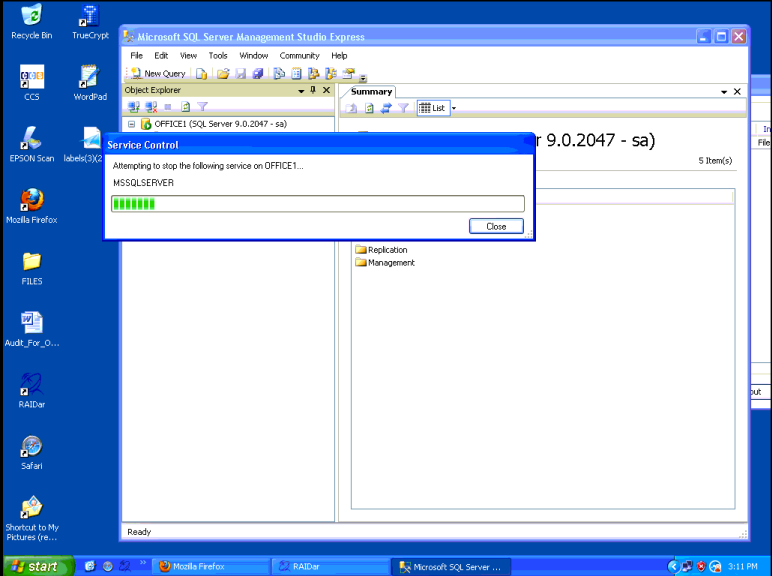
Then Stop the SQL Server Service. Right click on the node and select Stop, or select Restart. You will get a window that shows the Service restarting.
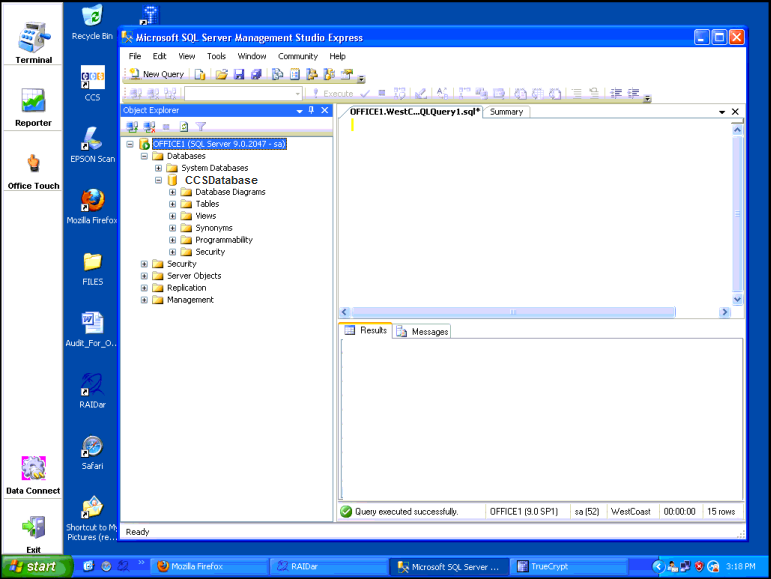
Then start SQL Server. You will expand the SQL Server node from the tree on the right. Then expand the Databases node. This example is shown in the figure below.
Starting the POS
From the Desktop, press the CCS Icon, then the Terminal or the Office Touch Button. This concludes the Data Protection Management Section.
Trace: • data_protection_management

